
Showing posts with label Projects. Show all posts
Showing posts with label Projects. Show all posts
Friday, July 6, 2012
Pot Holders for Skillet Handle
You know those little pot holders that are always on the end of cast iron skillets at restaurants when you get fajitas? Well, I decided I was tired of using a dish towel to hold the handle of my skillet while cooking and set out to make some of my own. I will be posting the finished products and a brief tutorial sometime this coming week. They turned out pretty well.

Wednesday, June 13, 2012
Garden Update
I just read my last update and it was quite terrible. I guess that's what I get for writing a post and not finishing in the same day or even week.
Here's an update on my garden:
-The peppers I started from seed in February/March were planted in the ground and then shriveled up and wilted from the heat.
-My mom so graciously bought me some pepper plants to replace the ones that died. (I've decided to never plant from seed again on peppers)
-I have a chocolate pepper plant, California wonder peppers, and orange pepper plant, and some yellow pepper plants
-There are quite a few blossom, one pepper an inch or 2 long, and a few tiny tiny peppers
-I had to replant my green bean row because none of the beans came up, but now they are thriving
-I replanted my carrot row, we'll see if they come up too
-The tomatoes are doing fantastic! They must really like the type of soil we have!!! They are starting to get blossoms and maybe some tiny tiny tomatoes
-The sweet corn I planted is barely coming up, so that may be a flop this year too
-zucchini and summer squash are popping up!
-Some of the onions are thriving, others have died, but that's fine.
 Tomatoes and peppers
 Everything else!
Here's an update on my garden:
-The peppers I started from seed in February/March were planted in the ground and then shriveled up and wilted from the heat.
-My mom so graciously bought me some pepper plants to replace the ones that died. (I've decided to never plant from seed again on peppers)
-I have a chocolate pepper plant, California wonder peppers, and orange pepper plant, and some yellow pepper plants
-There are quite a few blossom, one pepper an inch or 2 long, and a few tiny tiny peppers
-I had to replant my green bean row because none of the beans came up, but now they are thriving
-I replanted my carrot row, we'll see if they come up too
-The tomatoes are doing fantastic! They must really like the type of soil we have!!! They are starting to get blossoms and maybe some tiny tiny tomatoes
-The sweet corn I planted is barely coming up, so that may be a flop this year too
-zucchini and summer squash are popping up!
-Some of the onions are thriving, others have died, but that's fine.


Monday, May 21, 2012
Knitted Socks
My sister got me a lovely skein of fisherman's wool for this past Christmas. L asked me to use the yarn to make him a pair of knitted socks since his feet get cold in the winter. Shortly after Christmas I began knitting socks without a pattern. I figure I'd wind it under I got to the heel portion; and so I did. Our local library has a good selection of knitting books, and I was able to pick up a book called Teach Yourself Visually, Sock Knitting. The book was exactly what I need to get working on my socks to get them completed. I am happy to announce that about a month ago I completed my first pair of knitted wool socks!!!

They took forever with size 1 needles, but they are very warm and very comfortable. Since L and I have similarly sized feet, I am able to steal borrow them if I want.
Saturday, April 28, 2012
Cast Iron Care
I am a strong believer in cast iron. Food barely ever sticks, it cooks better and more evenly, and (in my opinion) tastes better. I have at least 6 cast iron pots and skillets, (not including the two fajitas ones). I use my 12 inch skillet for nearly every meal. What I like best is their versatility and ease of care. Did I mention they can go from stove to oven? How many pans do you own that can do that? When I take my cast iron to our events all I have to do is give it a quick scrub with hot water and a stiff brush and it's clean, and the same at home, so easy!
I recently acquired a nice old cast iron set from my grandmother, so I'm going to walk you through the steps of cleaning and seasoning old cast iron
 The set I acquired can be two separate skillets, or a skillet with a lid; very versatile.
Here they are before


3. Place on stove top and turn on burner, add a small about of food safe oil or shortening, heat until melted.


5. Get to cooking!!!! I always use canola cooking spray before I cook something, and after cleaning and drying to maintain the seasoning. At first stay away from acid foods such as tomatoes, and beans, and stick to cooking fatty foods like hamburger, bacon, sausage, etc. And remember, the more you cook in your cast iron, the better seasoned it will be, and the smoother the surface will be.


I recently acquired a nice old cast iron set from my grandmother, so I'm going to walk you through the steps of cleaning and seasoning old cast iron

Here they are before


I'd bet that you've been to an antique store and seen the selection of cast iron, and a lot of it looks like the before pictures. You probably thought to yourself that it was ruined and worthless and it would be better to buy new cast iron. Let me tell you that the old cast iron is much heavier and usually higher quality than the cast iron you can buy in stores today. And, the ugly old ruined cast iron can look brand new again and cook like a dream.
When you pick up older cast iron look for the amount of rust on it. Minimal rust can be easily fixed, but lots of rust takes lots of work (think sand blasting). Mine had a tiny bit of rust and looked unsightly, but was overall in great condition.
1. Put the skillet, pot, etc. in your sink under running water, the hottest you can stand. Using a stiff bristled brush, or plain steel wool, scrub the entire surface of the pan; inside, outside, handle, and the crevices. DO NOT USE SOAP. Salt may also be used as a scrubbing agent if needed.
Note: NEVER EVER leave cast iron in the sink to soak, it can ruin it!

2. Dry thoroughly with a towel.


4. Turn off heat, and carefully with a paper towel rub the oil/melted shortening over the entire surface of the pan.


NOTE: The pans I got did not need to be seasoned more than this, however, some pans will need to be stripped of their current seasoning and re-seasoned in the oven. For more information check out Cast Iron Cooking for Dummies (one of my favorite resources)
Edit: As my loving husband pointed out, I switched the pans in the after photo. Oh well, you get the point.
Edit: As my loving husband pointed out, I switched the pans in the after photo. Oh well, you get the point.
Sunday, January 15, 2012
Busy, Busy, Busy
With the start of a new school semester (last semester before student teaching!) I thought I might warn you that blog post may be more infrequent than before. I am currently working on two projects, one sewing and one knitting but have no idea when either is done since I am trying to stay ahead this semester. Plus husband and I have started working on our house again.
Since I don't want to disappoint you, I'll leave you with a sneak peek of one of my projects.
 My silly kitties immediately think that anything new is a toy for them. (Charlie and Captain Jack)
Since I don't want to disappoint you, I'll leave you with a sneak peek of one of my projects.

Tuesday, December 27, 2011
First Knitting Project
Normally when people learn to knit they start with giant needles and an easy project, like a scarf. I didn't want or need a scarf so I wanted to do something else. After a trip to the library I brought home two books: Knitting for Dummies and Sock Yarn: One Skein Wonders. I leafed through the pages and found a pair of mittens that I wanted to try.

This pattern required size 1 double pointed knitting needles (which I already had) and is done in the round. I was up for the challenge and started right away.
Since it was my first project I didn't always have the tension right, my stitches were extremely tight. I also messed up on the cuff and took it out at least twice. On the first mitten the cuff is checkerboard because I somehow got the stitches off.
I learned a lot about knitting through my first project; tension, "reading" the stitches, becoming familiar with purling and knitting, and reading and understanding patterns.
I promised my cousin I'd post pictures of the mittens, but they are currently on the furnace vents drying as I attempt to felt them so they are a little smaller. So cousin, you'll have to wait until later to see my mittens.
I am now working on a pair of socks for my husband using fisherman's yarn that my sister gave me for Christmas.
Scottish Fleet Mittens (photo from google and found in One Skein Wonders)
Since it was my first project I didn't always have the tension right, my stitches were extremely tight. I also messed up on the cuff and took it out at least twice. On the first mitten the cuff is checkerboard because I somehow got the stitches off.
I learned a lot about knitting through my first project; tension, "reading" the stitches, becoming familiar with purling and knitting, and reading and understanding patterns.
I promised my cousin I'd post pictures of the mittens, but they are currently on the furnace vents drying as I attempt to felt them so they are a little smaller. So cousin, you'll have to wait until later to see my mittens.
I am now working on a pair of socks for my husband using fisherman's yarn that my sister gave me for Christmas.
Monday, December 19, 2011
Finished Sock Monkeys!
After working hard over the weekend, the sock monkeys are finished as promised. Before I show you the finished monkeys I want to show you how they got there.

Remember when there were just two pairs of socks?


Thanks to my sewing machine they became a pair of socks with a little bit of sewing and some stuffing. They look really funny like this. I think they look a little bit like colorful potatoes.


 Complete with an embroidered "R" on their butts so the girls would always know that I made them.


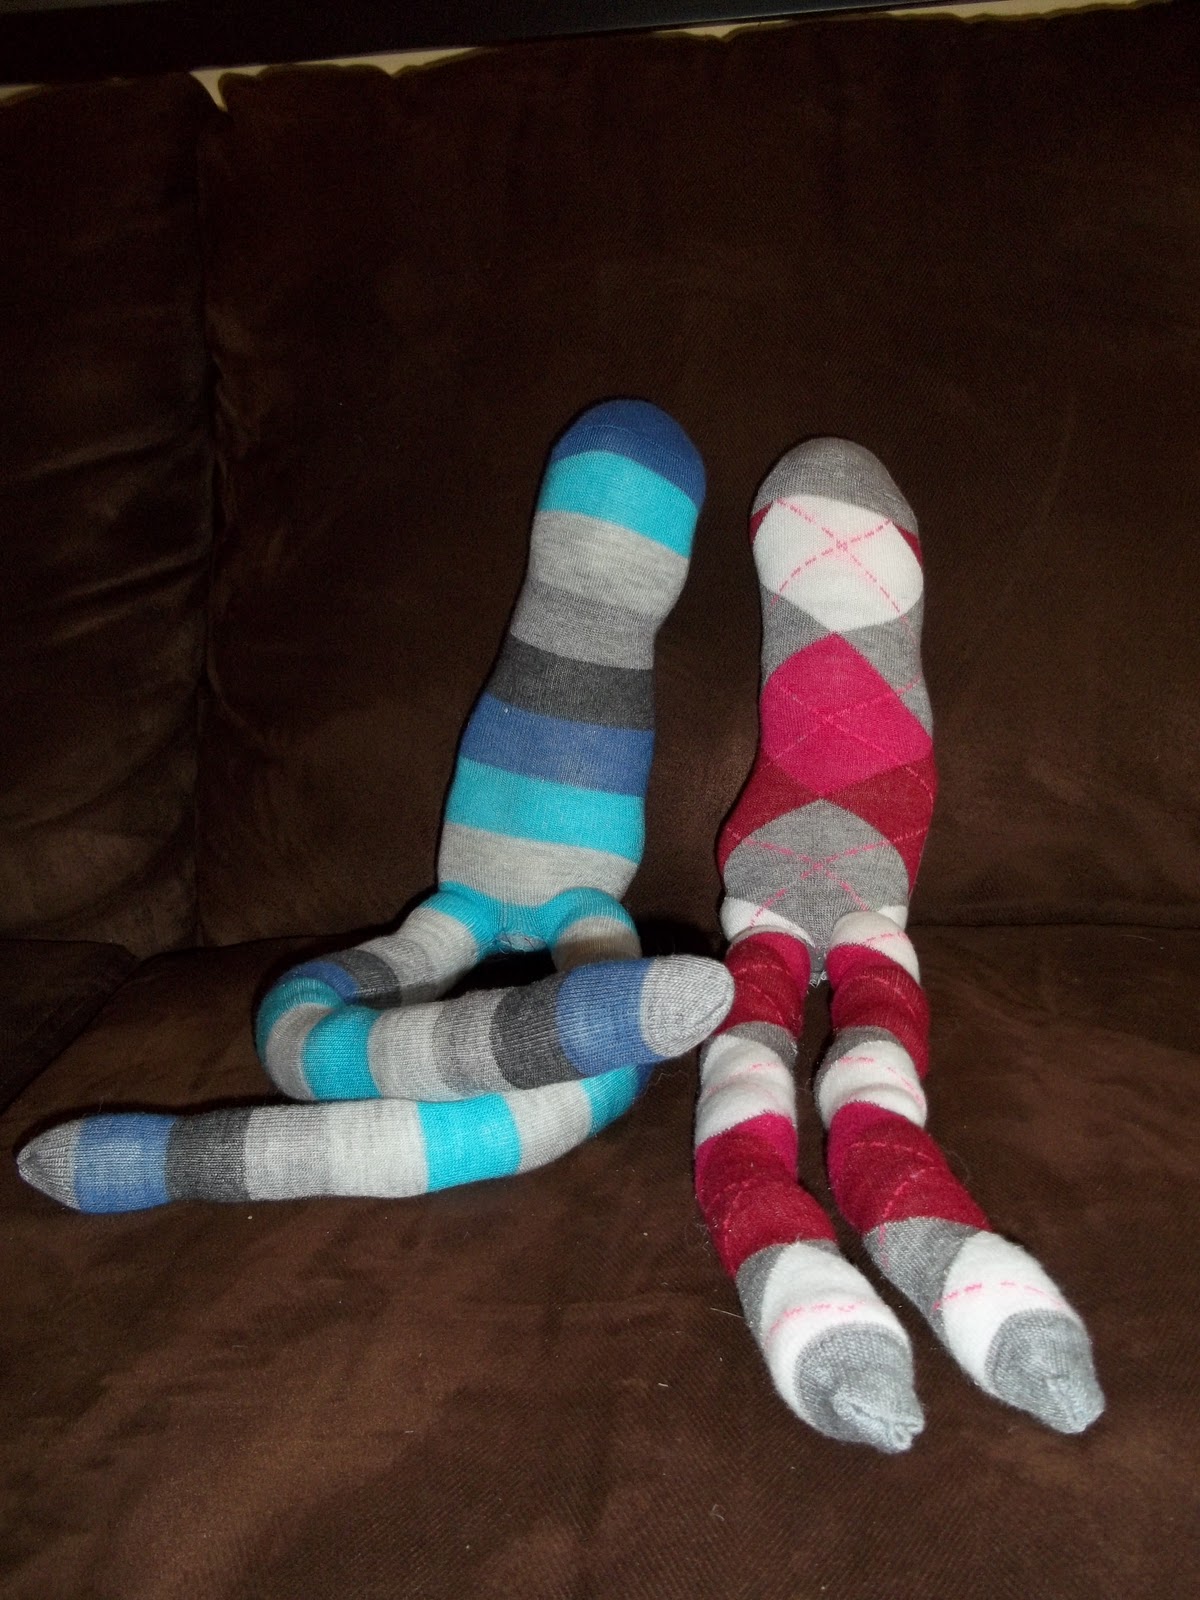
Our cat Captain Jack who is very much still a kitten decided to play with the blue monkey and then later snuggle with the pink monkey. He's pretty adorable if I say so myself.


And here they are.... My finished monkeys!! The longest part was hand stitching the arms, tail, mouth, eyes, and ears on. I opted not to add a mouth because I just couldn't get it right. Oh well, they are still cute.


And one last picture that I took while writing this post because Jack was being such a darling again.

Friday, December 16, 2011
Sock Monkeys
I've always thought socks monkeys were pretty cute. It must be their cute red mouth or their timeless look. Until recently I hadn't seen them very often; here and there, in pictures etc. I always thought that sock monkeys were difficult to make. How does one take a sock a make a stuffed animal out of it?
And then came pinterest. I saw a couple tutorials on how to make them on pinterest and thought, why not? So here I am making sock monkeys for my sister in laws (11 years old, twins) for Christmas. Shhh don't tell them what they are getting!!
Out of the two tutorials that I "pinned" here and here. I like the second one best. It's more straight forward and she has tutorials for sock cows and sock elephants. Future projects?
On a trip to target I stopped to look at the juniors socks. The tutorial had said the more colorful the better, so these are the socks that I picked. They are knee high socks from Target.
I'm now about half way done with the monkeys so hopefully by next week there will be a sock monkey 2 post.
Subscribe to:
Posts (Atom)